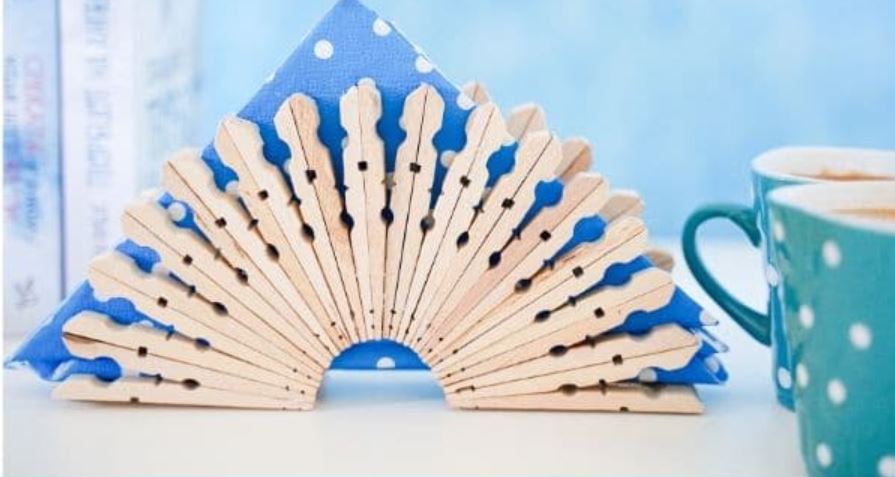
This simple but cute napkin older can be set on your dining table for a soft-rustic look. Keep the clothespins their original color or paint them so they match the decor in your home — the choice is yours. This tutorial from diyncrafts.com is fast and easy to do!
Supplies:
34 Clothespins
Hot glue gun
Glue stick or glue rope
Paint and paint brushes (optional)
Directions:
- Take apart your clothespins removing the metal piece in the middle. You will need a total of 34 clothespins.
- Once the clothespins have been separated, you will flip them so they are flat side to flat side, and glue together all but 2 sets.
- Now, glue the sets together so that you have 14 glued together in a half-circle shape. On the end of each side of this, you will attach one single piece of a clothespin so the flat side is facing the outside.
- Repeat this process so you have two complete half circles.
- Now, you will take the other 4 clothespin pieces, and glue two side by side and then repeat with an additional two. Glue those sets onto the bottom edge of one side of your napkin holder to create a flat base.
- Attach the other side and let the glue dry
- Then add to your kitchen and fill with napkins!
See full tutorial here.
